Quick answer
A hockey shooting pad is a slick plastic sheet that lets a puck slide like on ice, protects your stick blade from concrete, and protects the floor from your stick. For most players, the best starting size is a 24"x48" pad for stationary wrist shots and stickhandling; move up to a 4'x8.5' roll-up pad if you want to walk into shots or train passing. Bigger is better if you have the space — you never outgrow surface area.
Key takeaways
- A shooting pad's job is glide and protection: near-ice puck feel, no blade damage, no floor damage.
- 24"x48" is enough for stationary shooting and hands; 28"x57" adds room for a wider release.
- Roll-up pads (4'x8.5' and 4.5'x10') let you pull the puck across your body and step into shots.
- All sizes work on any flat surface: garage, basement, driveway, or backyard grass with plywood under it.
- If you want a permanent surface you can stand on in shoes and expand over time, interlocking tiles beat a pad.
What does a hockey shooting pad do?
Shooting a puck off concrete or asphalt does two things badly: the puck drags instead of sliding, and the rough surface chews up a stick blade in weeks. A shooting pad fixes both. The surface is smooth, slightly slick polyethylene, so the puck glides and spins off the blade the way it does on ice — which means the mechanics you build at home actually transfer.
It also saves money. A composite stick costs more than most shooting pads, and grinding its blade on a driveway is the fastest way to ruin it. The pad takes the abuse instead.
One pad, a bucket of training pucks, and a target give you a complete shooting station. That is why a shooting pad is almost always the first purchase in a home hockey training setup.
Shooting pad size comparison
Better Hockey makes four sizes of the Extreme shooting pad. Same surface, same puck feel — the difference is how much room you have to work with and how you store it.
| Pad | Size | Price | Storage | Best for |
|---|---|---|---|---|
| Shooting Pad 24"x48" | 24" × 48" (120×60 cm) | $69.95 | Rigid sheet, slides behind a shelf | Stationary wrist/snap shots, stickhandling, small spaces, younger players |
| Pro Shooting Pad 28"x57" | 28" × 57" (150×75 cm) | $99.95 | Rigid sheet | Teen and adult players who need room for a full pull-and-release |
| Roll-Up Shooting Pad 4'x8.5' | 4' × 8.5' (260×122 cm) | $149.95 | Rolls up like a mat | Walking into shots, toe drags into a release, passing off the pad |
| Roll-Up Shooting Pad XL 4.5'x10' | 4.5' × 10' (305×138 cm) | $159.95 | Rolls up like a mat | Two players side by side, one-timers, the biggest single-piece surface |
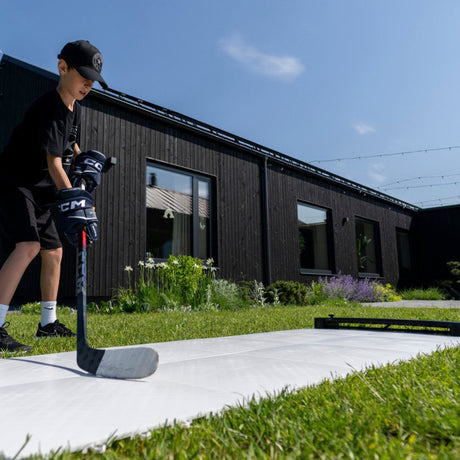
Here is the pad surface in action:
Which size should you buy?

Match the pad to the player and the space, not the other way around:
- Players under ~10, or any tight space (apartment, small garage corner): the 24"x48" pad. Kids don't have a long release yet, and 8 square feet covers stationary shooting and all stickhandling work.
- Teens and adults shooting stationary: the Pro 28"x57". A grown player's wrist shot pulls the puck 3–4 feet from behind the back foot to the release point — the extra 9 inches of length matter more than they sound.
- Anyone serious about shot volume (100+ shots a day): the Roll-Up 4'x8.5'. You can set a line of 5 pucks, walk down the pad, and shoot in rhythm. It also gives you space to receive a pass from a rebounder before shooting.
- Families with two kids, or one-timer training: the Roll-Up XL 4.5'x10'. One player feeds from one end, the other shoots — or one player trains catch-and-release with room to spare.
Coach Erik's tip: The most common setup I see at players' homes is a pad one size too small shoved into a corner. Before you buy, have the player take their full wrist shot in the space — feet set, puck pulled behind the back foot — and make sure the whole motion fits on the surface with a hand's width to spare on each end.
A simple rule: buy the biggest pad your space fits. Nobody has ever complained a shooting surface was too big, and the price difference between the smallest and largest pad is less than one composite stick.
Shooting pad vs training tiles: which do you need?
Both give you the same slick surface. The difference is footprint and permanence:
- Choose a pad if you want to start today for under $160, store it away between sessions, or bring it to the rink for pre-game warm-ups. A pad sits on top of the floor — you shoot from it, standing beside it.
- Choose interlocking tiles if you're building a permanent zone you stand on in shoes, want the puck and your feet on the same surface, or plan to grow the area later — tiles expand one pack at a time, a pad never gets bigger.
- Do both if the budget allows: many families start with a pad, then add a tile floor a season later and keep the pad for travel.
For the full comparison including synthetic ice, read synthetic ice vs hockey training tiles.
How to get the most out of a shooting pad
- Anchor it. On smooth floors the pad can creep — half the home setups I visit have a pad that shifts an inch on every shot. Put it against a wall edge, tape the front lip, or set it on a rubber mat.
- Give yourself a target. Shooting into open net builds volume, not accuracy. Hang shooting targets in the corners of a net like the Goal Pro Steel.
- Protect what's behind. Indoors or near windows, a shooting tarp behind the net catches the misses.
- Shoot in sets, not sprays. 5 sets of 20 shots with a named target each set beats 100 random blasts. Cue: call the corner out loud before the puck leaves the blade. Track hits per set.
- Rotate shot types. 50 wrist shots, 25 snap shots, 25 backhands per session. Watch for: the backhand follow-through dying low — finish at the same height as your forehand. The pad handles all of them.
- Use real pucks. The pad exists so you can train with a 6 oz puck, not a ball. Keep 20+ pucks in a bucket so you're shooting, not collecting.
Coach Erik's tip: Finish every session with ten shots eyes-up: pick your corner, then look at the net — not the puck — through the entire release. Most players I train fight it for a week, and then it quietly shows up in their games.
Want a complete station in one box? The Start-Up Shooting Kit bundles the pad, targets, and pucks. For structured sessions, follow the routines in how to practice hockey shooting at home and best hockey shooting drills.
Common mistakes
- Buying too small to "test it out." A cramped pad forces a short, cheated release — the first thing I check when a player's shot looks rushed is how much surface they train on at home. Fix: size to the player's actual shooting motion — teens and adults should start at 28"x57" minimum.
- Shooting off the edge of the pad. The puck should start and release on the surface. Fix: position pucks in the middle third of the pad, not the border.
- Putting the pad on deep grass or gravel. The surface flexes and the puck bounces. Fix: use a flat hard base — patio, driveway, or a sheet of plywood on grass.
- Ignoring winter storage for roll-up pads. Rolled tightly in a cold garage, the pad holds a curl. Fix: store it flat or loosely rolled, and let it warm up before use so it lies flat.
- Never measuring progress. The pad enables volume; volume without a score teaches nothing. Fix: count targets hit per 20 shots, or clock your hardest shot with a speed radar.
FAQ
What size shooting pad should I get?
Players under about 10, or anyone in a tight space, are fine with 24"x48". Teens and adults should go 28"x57" or larger. If you want to walk into shots or train passing, choose a 4'x8.5' or 4.5'x10' roll-up pad. When in doubt, buy the largest size your space allows.
Can I use a shooting pad outside?
Yes. Shooting pads work on driveways, patios, and decks year-round. On grass, put plywood underneath so the surface stays flat. Bring roll-up pads indoors or store them flat in freezing weather so they don't hold a curl.
Do real pucks slide well on a shooting pad?
Yes — that's the point. The slick polyethylene surface gives a standard 6 oz puck near-ice glide, so your release mechanics transfer to the rink. On bare concrete a puck drags and flips; on a pad it slides and spins correctly off the blade.
Will a shooting pad damage my stick?
No, the opposite: it protects the blade. Shooting off concrete or asphalt sands down a blade in weeks; the smooth pad surface causes minimal wear, similar to ice.
What's the difference between a shooting pad and hockey training tiles?
A pad is a single portable sheet you shoot from; tiles are interlocking squares that build a permanent floor you stand on in shoes. Pads are cheaper and portable; tiles cover more area and can be expanded pack by pack.
How many pucks do I need for shooting pad training?
At least 10, ideally 20–25. With one puck you spend the session fetching instead of shooting. A 25-pack of training pucks keeps a 100-shot session moving with only a few collection breaks.
Summary
A shooting pad is the cheapest, fastest way to make home shooting practice actually count: real pucks, real glide, no wrecked sticks or floors. Start at 24"x48" for kids and small spaces, 28"x57" for teens and adults, and go roll-up size the moment you want to move with the puck. Pair it with targets and 20 pucks, shoot 100 a day, and the difference shows up on the ice within a month.
Next steps: browse all shooting pads, see how tiles compare in our training tiles guide, or plan the whole zone with the home hockey training setup guide. More drills live in the shooting hub.