Quick answer
A home hockey training setup needs three things: a slick surface for the puck, something to shoot at, and enough clear space to swing a stick — about 4×8 ft to start, 10×15 ft for a full zone. A starter setup (shooting pad, stickhandling ball, pucks) costs under $150; a serious garage zone with a tile floor, net, and targets runs $700–1,000; a dream basement rink with everything lands around $2,000. Build it in that order — surface first, targets second, extras last.
Key takeaways
- Start with the surface: nothing else works until a puck slides properly at your house.
- $150 gets a real starter setup; you can be shooting 100 pucks a day this week.
- Garage, basement, and backyard each work — ceiling height and weather decide which.
- Buy in stages: every tier below builds on the previous one, nothing gets thrown away.
- The setup is only half the job — the daily routine is the other half (see our home training guide).
The three tiers: starter, serious, dream
Match the tier to the player's commitment, not their age — I've watched motivated 9-year-olds outgrow a starter setup faster than casual 14-year-olds.
| Tier | Budget | Space needed | Equipment | What you can train |
|---|---|---|---|---|
| Starter | ~$150 | 4×8 ft | Shooting pad 24"x48", stickhandling balls, 10–25 pucks, cones | Wrist/snap shots, stickhandling |
| Serious | $700–1,000 | 8×12 ft | + Tile floor (20–30 pack) or roll-up pad, full-size goal, targets, rebounder | + Accuracy, passing, one-timers, moving drills |
| Dream | $1,800–2,500 | 10×15 ft or more | + 40–60 pack tiles, shooting tarp, passer, slide board, speed radar | Everything, incl. skating-specific conditioning and measured progress |
Starter tier (~$150): shoot today
The minimum that produces real improvement: an Extreme Shooting Pad 24"x48" ($69.95), a stickhandling ball 12-pack ($24.95), and training pucks ($49.95). Shoot into an old net, a tarp, or a plywood board with taped corners. This tier covers the two highest-value skills — shot and hands — and everything carries forward to later tiers.
Serious tier ($700–1,000): the real training zone
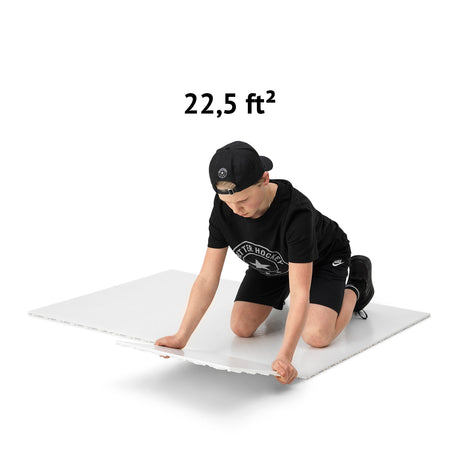
Two upgrades change everything. First, a surface you stand on: a 20-pack of flooring tiles (45 sq. ft., $269.95) or a 4'x8.5' roll-up pad ($149.95) — read tiles explained to choose. Second, something real to shoot at: the Goal Pro Steel ($179.95) with shooting targets ($39.95) in the corners. Add an Extreme Rebounder ($69.95) and passing training stops requiring a partner.
Coach Erik's tip: Of all the home zones I've visited, the ones that get used daily share one thing: nothing gets packed away. The moment the net lives folded behind the freezer and the pucks live in a drawer, sessions drop from five a week to one. Give the zone a permanent corner, even a small one.
Dream tier ($1,800–2,500): the home rink
Scale the floor to a 40-pack or 60-pack (90–130 sq. ft.), hang a shooting tarp behind the goal to end puck-chasing, and add the measurement and conditioning layer: a speed radar ($59.95) to track shot velocity and a slide board ($199.95) for skating-specific leg work. At this tier the limiting factor is no longer equipment — it's the routine.
Garage vs basement vs backyard
Every location works for something. Here's what decides it:
| Location | Ceiling height | Flooring | Weather | Best for |
|---|---|---|---|---|
| Garage | Usually 8–9 ft — full shots OK | Concrete: flat, ideal tile base | Cold in winter but usable year-round | The all-round winner: shooting zone + parked car coexist |
| Basement | Often 7 ft or less — check your backswing | Concrete or carpet (tiles go over both if flat) | Climate-controlled, trains 365 days | Stickhandling and passing; low-ceiling shooting = sweep shots only |
| Backyard / driveway | Unlimited — slapshots welcome | Needs flat, hard base; plywood under tiles on grass | Season-dependent; gear is weatherproof, motivation isn't | Full shooting with a big net, backstop, and room to miss |
Quick tests before you buy: swing your longest stick where the ceiling is lowest — if a full wrist-shot follow-through clears, you're fine. Then roll a puck across the floor: if it wanders, the floor isn't flat enough for tiles without leveling. Outdoors, think about what's behind the net — a backstop net is cheaper than a neighbor's window.
Step-by-step build order
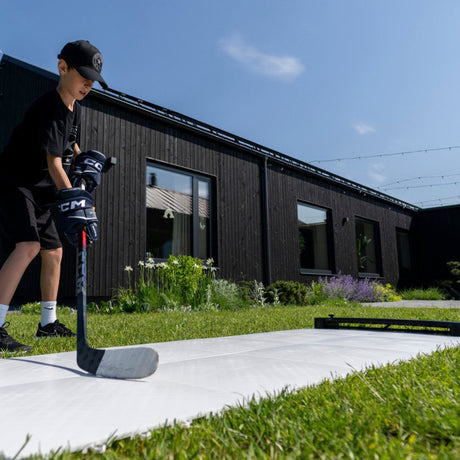
Here's a full backyard zone in action — surface, goal, targets, and rebounder working together:
- Measure the space. Mark the training area with tape or cones. Minimum 4×8 ft; check ceiling clearance with a real stick swing.
- Lay the surface. Pad or tiles, on the flattest ground available. This is the foundation every other purchase depends on.
- Set the shooting direction. Face the net toward a wall, fence, or garage door — never toward windows, cars, or the street. Misses happen daily.
- Add the net and protection. Goal first, then tarp or backstop behind it. Only now does high-volume shooting make sense.
- Add targets. Corners win games — make every shot aim at something specific.
- Add the passing station. A rebounder along one edge of the surface turns solo sessions into give-and-go training.
- Organize for zero friction. Pucks in a bucket, sticks on hooks, balls in reach. If setup takes 5 minutes, training happens half as often. If it takes 30 seconds, it happens daily.

Common mistakes
- Buying gadgets before the surface. A radar with no place for the puck to slide is a paperweight. Fix: follow the build order — surface, target, then extras.
- Ignoring ceiling height in the basement. A broken light fixture ends home training for a month. Fix: test the full swing in every spot you plan to shoot from.
- No protection behind the net. One dented garage door or broken window costs more than a tarp and kills family support for the project. Fix: hang protection before the first 100-shot session.
- Building it and not scheduling it. The setup doesn't train the player; the routine does. Fix: pair the zone with the 25-minute daily plan in hockey training at home or the structured weekly off-ice program.
- Going all-in on day one. Some players train daily for years; some lose interest by November. Fix: start at the starter tier and let consistency earn the upgrades.
FAQ
How much does a home hockey training setup cost?
A working starter setup — shooting pad, stickhandling balls, and pucks — costs under $150. A serious zone with a tile floor, full-size goal, targets, and rebounder runs $700–1,000. A complete dream setup with a large tile floor, tarp, radar, and slide board lands around $1,800–2,500.
How much space do I need for a home hockey setup?
4×8 ft covers shooting and stickhandling — one garage corner. A full zone with a net, moving drills, and passing wants 10×15 ft. Ceiling height matters more than floor area indoors: check that a full shot follow-through clears.
Is a garage or basement better for hockey training?
Garage, usually: flat concrete floor, 8–9 ft ceilings for full shots, and the car can park on a tile floor. Basements win on year-round comfort but often have ceilings too low for full shooting — they make excellent stickhandling and passing rooms.
What should I buy first for home hockey training?
A shooting surface — pad or tiles — before anything else. Nothing else in the setup works until a puck slides properly. Second purchase: a real net with targets. Everything after that is refinement.
Can I build a home setup outdoors year-round?
The equipment can handle it — tiles, pads, goals, and tarps are weatherproof. Snow and rain interrupt training, though, so most families run backyard zones spring–fall and move a pad indoors for winter.
Does a home setup actually make players better?
Yes, if it gets used. Skill comes from repetitions, and home setups produce volume ice time can't: 100 shots and 10 minutes of stickhandling a day is 36,000+ shots and 60 hours of hands work a year. The setup's job is making those reps frictionless.
Summary
Build the zone in order — surface, net, protection, targets, passing, extras — and size it to your real space and real commitment. $150 starts it, and every later purchase snaps onto what you already own. Then do the part no store sells: show up 25 minutes a day. The full routine to run in your new zone is in hockey training at home.
Deeper equipment research: choosing a shooting pad, training tiles explained, and the rest of the equipment guides hub.