Quick answer
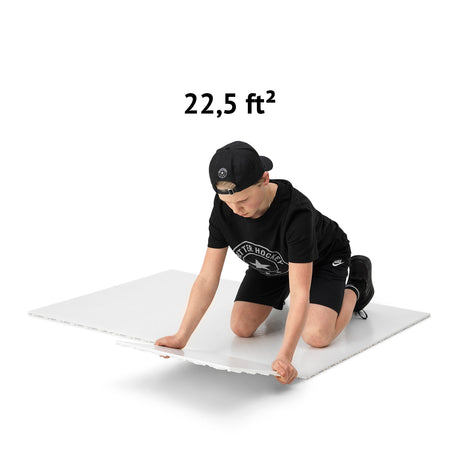
Hockey training tiles are 18"x18" interlocking plastic squares that snap together into a smooth, slick floor where a puck glides like on ice. You train on them in regular shoes — stickhandling, shooting, and passing, not skating. A 10-pack covers 22.5 sq. ft. (enough for one player's hands and shot work), and because packs connect to each other, you can start small and expand the floor one pack at a time as space and budget allow.
Key takeaways
- Tiles snap together like puzzle pieces — no glue, no tools, and you can take them apart and move them.
- The surface is slick enough for real pucks but grippy enough to train in sneakers.
- Packs run from 10 tiles (22.5 sq. ft.) to 60 tiles (130 sq. ft.) and all connect with each other.
- Unlike a shooting pad, you stand ON the surface — puck and feet on the same plane, like on ice.
- Start with a small pack and expand later; the smartest setups grow one pack per season.
- Tiles are for skills in shoes. If you need to skate, that's synthetic ice — a different (more expensive) product.
How do hockey training tiles work?
Each tile is a rigid square of low-friction plastic with connector loops on the edges. You lay them in a grid, press the edges together, and they lock flat. The result is one continuous surface with seams tight enough that a puck passes over them without catching.
Two properties make the surface work for hockey. First, it is slick: a 6 oz puck slides and spins off the blade close to how it does on ice, so the release and passing mechanics you build transfer directly. Second, it is stable underfoot: you train in regular trainers, plant, pivot, and shift weight through shots exactly like your skating stance.
Because you stand on the same surface the puck is on, tiles fix the biggest limitation of a small shooting pad: reach. Toe drags, wide dribbles, walking into a shot, pulling a puck through your feet — everything happens at ice-like speed under your feet, not beside them. Watch for: weight sinking back on the heels — stay on the balls of your feet, same as your skating stance.
Coach Erik's tip: When I help set up floors at players' homes, the first thing I check is the base, not the tiles. Run a straight stick shaft across the concrete before you lay anything — a low spot you can see daylight under will flex and pop seams within a month.
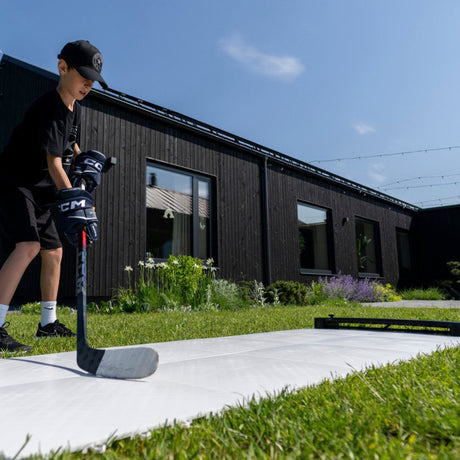
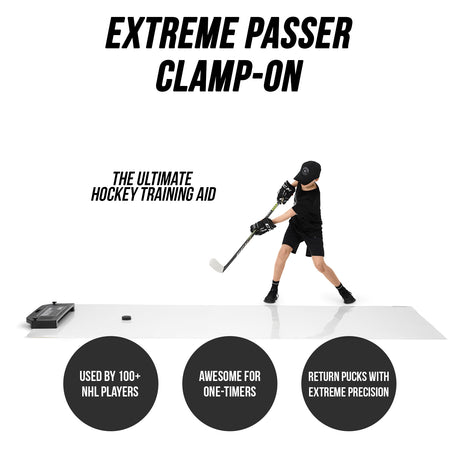
Here is what a tile floor looks like set up and in use:
What size pack do you need?
All packs use the same tile, so any pack extends any other. Prices below are current at time of writing.
| Pack | Coverage | Example layout | Price | Good for |
|---|---|---|---|---|
| 10-pack | 22.5 sq. ft. | 3' × 7.5' strip | $139.95 | Stickhandling lane, stationary shooting spot |
| 20-pack | 45 sq. ft. | 6' × 7.5' | $269.95 | One player: hands + shooting with room to move |
| 30-pack | 67.5 sq. ft. | 7.5' × 9' | $369.95 | Garage corner zone, walking into shots |
| 40-pack | 90 sq. ft. | 7.5' × 12' | $519.95 | Full single-car garage bay width, passing drills |
| 50-pack | 107.5 sq. ft. | ~9' × 12' | $639.95 | Basement mini-rink, two players training |
| 60-pack | 130 sq. ft. | ~10.5' × 12' | $749.95 | Dedicated training room, net + full drill space |
That works out to roughly $6 per square foot at every pack size — for comparison, synthetic ice typically starts at double that. Full comparison here: synthetic ice vs hockey training tiles.
Layout ideas for garage and basement

Tiles are modular, so shape the floor to the room — it doesn't have to be a rectangle:
- Garage bay (net against the door): a 40-pack laid 7.5' × 12' fills the shooting lane in front of a full-size goal. Park the car on it in the off-hours — tiles handle the weight.
- Basement strip: a 20-pack laid 3' × 15' (two tiles wide) makes a stickhandling and passing lane along a wall. Low ceilings don't matter for hands work.
- L-shape around obstacles: because every tile connects on all sides, you can route the floor around a support post or furnace — something a one-piece pad can't do.
- Backyard patio square: a 30-pack on flat pavers makes a summer zone; tiles are weatherproof, so they can stay out all season.
Whatever the layout, leave the puck-side edge facing your net or rebounder so pucks leave the floor cleanly.
Start small, expand later
The most common mistake I see families make is treating tiles as one big purchase decision. You don't have to. A realistic growth path:
- Season 1 — 10 or 20-pack ($139.95–$269.95). Set up a hands-and-shot station. Add a stickhandling ball and a bucket of pucks and you're training daily.
- Season 2 — add a 20-pack. Snap it onto the existing floor. Now you have room to walk into shots and work moves at speed.
- Season 3 — add a net and targets. Bundles like the Flooring Tiles Shooting Kit pair the floor with a goal and accessories if you'd rather jump straight to the full zone.
- Anytime — reshape. Moving house or reorganizing the garage? Unclip, restack, relay. Nothing is wasted.
Buying in stages costs slightly more per square foot than one big pack, but it means you never pay for floor you don't use yet.
Coach Erik's tip: The tiles under the shooting spot dull first — after hundreds of sessions that patch loses a little glide before the rest. Once a season, swap those tiles with fresh ones from the edge of the floor and the whole surface ages evenly.
Tiles vs shooting pad vs synthetic ice
| Training tiles | Shooting pad | Synthetic ice | |
|---|---|---|---|
| You stand on it | Yes, in shoes | No — you shoot from beside it | Yes, on skates |
| Skating possible | No | No | Yes |
| Typical cost per sq. ft. | ~$6 | ~$4–9 (small total size) | ~$12–25 |
| Maintenance | None — sweep it | None | Regular cleaning, glide treatment |
| Expandable | Pack by pack | No | Panel by panel (costly) |
| Best for | Permanent skills zone | First purchase, portability | Skating practice at home |
Short version: a shooting pad is the cheap, portable starting point; tiles are the permanent skills floor; synthetic ice is only worth it if skating is the goal.
Common mistakes
- Laying tiles on uneven ground. Gaps under tiles cause flex and popped seams. Fix: choose a flat, hard base — concrete, pavers, or plywood over grass.
- Buying exactly the space you have, wall to wall. You'll want a walking margin around the floor. Fix: plan the tile area, then leave at least 1–2 ft of clearance to walls where possible.
- Training only stationary on a big floor. The whole point of area is movement — I see this every week: a beautiful 40-pack floor and a player standing still in the middle of it. Fix: set cones or obstacles and run moving drills, or shrink the working space between two cones to force quicker hands — see stickhandling at home for a plan. Cue: eyes up every third rep — pick a spot on the wall and stickhandle to it.
- Expecting to skate on them. Tiles are a shoes-only surface. Fix: if skating at home is the actual goal, read the synthetic ice comparison before buying either.
- Letting grit build up. Sand and dust slow the puck. Fix: sweep or dry-mop the floor weekly — that's the entire maintenance routine.
FAQ
What are hockey training tiles?
They are 18"x18" interlocking plastic squares that snap together into a smooth, low-friction floor. A puck glides on them close to how it does on ice, so you can train stickhandling, shooting, and passing at home in regular shoes.
Can you skate on hockey training tiles?
No. Tiles are a shoes-only surface for stickhandling, shooting, and passing. Skating at home requires synthetic ice, which costs roughly two to four times more per square foot and needs regular maintenance.
How many tiles do I need to start?
A 10-pack (22.5 sq. ft.) covers a stickhandling and stationary shooting station for one player. A 20-pack (45 sq. ft.) is the sweet spot for most families — room to move with the puck. You can always snap on more packs later.
Do training tiles work outdoors?
Yes. The tiles are weatherproof and can live on a patio or flat driveway all season. The main requirement is a flat, hard base — on grass, lay plywood underneath first.
Do pucks slide on tiles like on ice?
Very close. The surface is engineered for low friction, so passes stay flat and the puck rolls off the blade correctly on shots. It's slightly slower than fresh ice, which many coaches consider a feature — clean technique on tiles feels easy on ice.
Are tiles better than a shooting pad?
They solve different problems. A pad is cheaper and portable but you shoot from beside it; tiles build a floor you stand on, which adds footwork, moving drills, and expandability. Many players start with a pad and add tiles later.
Summary
Training tiles turn a garage corner or basement wall into a permanent piece of practice ice for stickhandling and shooting in shoes: snap together, sweep occasionally, expand whenever. Start with a 10-pack or 20-pack, add packs as the player grows, and put the daily reps in — the surface does its job every single day it's on the floor.
Related reading: best shooting pad guide, the complete home training setup, and the full flooring tiles collection. More guides in the equipment guides hub.