Quick answer
Synthetic ice lets you skate at home; hockey training tiles don't — and that single difference decides everything else. If skating practice is the goal, synthetic ice is worth its higher price (roughly $12–25 per sq. ft.) and ongoing maintenance. If the goal is stickhandling, shooting, and passing reps, training tiles deliver the same puck glide for about $6 per sq. ft. with zero maintenance, trained in regular shoes. Most families who are honest about how the surface will actually be used end up with tiles.
Key takeaways
- Skateability is the real decision: synthetic ice yes, tiles no. Everything else is secondary.
- Tiles cost about $6 per sq. ft.; quality synthetic ice typically runs $12–25 per sq. ft. — 2–4x more for the same area.
- Synthetic ice needs regular cleaning and periodic glide treatment; tiles need a broom.
- Skating on synthetic ice adds ~10–15% more glide resistance than real ice and dulls skate blades noticeably faster.
- For pure puck skills per dollar, tiles win. For home skating practice, synthetic ice is the only option.
What's actually different between the two surfaces?
They look similar — white plastic panels on the floor — but they're engineered for different jobs.
Synthetic ice is made of dense polyethylene (usually UHMW-PE) sheets designed to be skated on with real metal blades. The panels are thick (typically 3/8" to 1/2"+), often use tongue-and-groove connections, and many products rely on a surface glide enhancer to keep friction down as the surface gets shaved by blades.
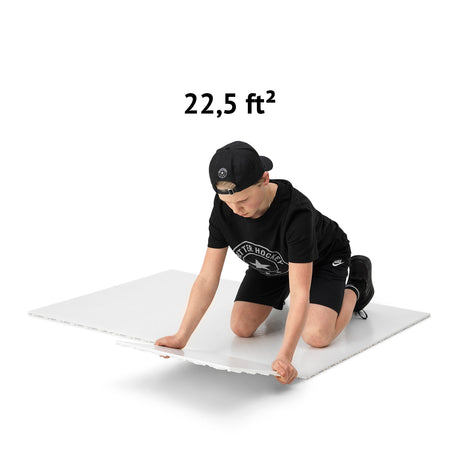
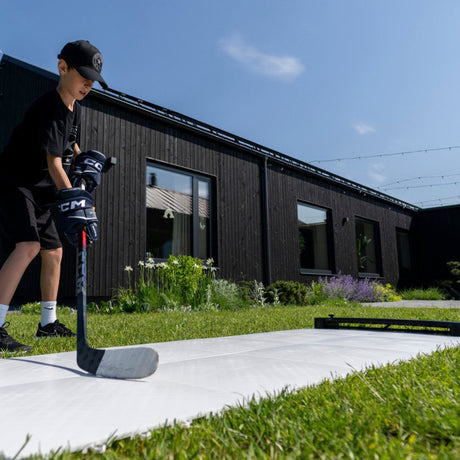
Training tiles are thinner interlocking squares of slick plastic designed for shoes. The surface is optimized for one thing: making a puck slide, spin, and pass like on ice while you stand on it in sneakers. No blades, no shavings, no treatment. (Full explainer: hockey training tiles explained.)
Coach Erik's tip: The first thing I check when a player asks which surface to buy is how they actually plan to use it — not how they imagine using it. Most of the time they describe a stickhandling and shooting routine, which means tiles are the right answer. I've seen families spend three times as much on synthetic ice and then train in shoes on it every single day.
Synthetic ice vs training tiles: head-to-head
| Synthetic ice | Hockey training tiles | |
|---|---|---|
| Skateability | Yes — real skates, edges, stops, crossovers | No — shoes only |
| Surface feel for the puck | Very close to ice; can slow as surface wears | Near-ice glide; slightly slower than fresh ice, consistent over time |
| Skating feel | ~10–15% more resistance than real ice; harder stride workout | Not applicable |
| Price per sq. ft. | ~$12–25 (quality panels) | ~$6 (e.g. 130 sq. ft. for $749.95) |
| Cost for a 90 sq. ft. zone | ~$1,100–2,200 | $519.95 (40-pack) |
| Maintenance | Regular cleaning of shavings, periodic glide treatment on many products | None — sweep occasionally |
| Effect on skate blades | Dulls blades faster; sharpen roughly 2–3x more often | No skates involved |
| Effect on stick blades | Minimal — smooth surface | Minimal — smooth surface |
| Weight and handling | Heavy, thick panels; more demanding install | Light tiles; one person snaps a floor together in minutes |
| Expandability | Panel by panel, at a high price per addition | Pack by pack, ~$140–270 per step |
| Best use case | Goalies, skating development, players with no ice access | Daily stickhandling, shooting, and passing volume in shoes |
When synthetic ice wins
Be honest about this side of the ledger — for some players synthetic ice is the right call:
- Skating is the skill gap. Edges, tight turns, and stride mechanics can only be trained on a skateable surface. Tiles do nothing for skating. Watch for: players who skate 3+ times a week are not getting better at skating because of the surface; they need better instruction, not more ice.
- Goalies. Butterfly slides, recoveries, and crease movement in full gear need a bladed surface at home.
- No ice access. If the nearest rink is an hour away, a synthetic pad may be the only regular "ice" a player gets — the higher cost buys something tiles can't offer at any price.
- Budget genuinely covers it. A usable skating area starts around 100+ sq. ft.; a small patch frustrates more than it trains. Plan $1,500–3,000 for a surface worth skating on, plus more frequent blade sharpening.
When training tiles win

- The actual daily use is puck skills. Track what home training really looks like: shooting 100 pucks, 10 minutes of stickhandling, passing off a rebounder. All of it works in shoes — none of it needs skates. Cue: focus on puck feel and quick hands, not on what's under your feet.
- Budget is finite. The $1,000+ saved versus synthetic ice buys the entire rest of the zone: a full-size goal, targets, pucks, and a rebounder — a complete setup instead of a bare floor.
- Nobody wants a maintenance routine. Tiles are sweep-and-play, every day, for years. No treatments, no shavings.
- Kids share the space. A tile floor doubles as a games surface and survives bikes, chairs, and parked cars; see layout ideas in the home hockey training setup guide.
Better Hockey sells training tiles, not synthetic ice — so read this recommendation with that in mind. But it matches what we tell customers who ask: if you need to skate, buy synthetic ice from a specialist; if you need skill reps, tiles give you the same puck training for a fraction of the money.
Coach Erik's tip: A practical constraint that works well: set up your tile zone so there's only about two metres between you and the rebounder. The tight space forces quicker hands and faster decisions — you can't wind up for a slow pass when the return is already coming back at you. Most players I train improve their release speed noticeably within two weeks of this simple adjustment.
How to decide in 5 steps
- Name the number-one skill to improve. Skating or goaltending → synthetic ice. Shooting, hands, or passing → tiles. Don't buy for a hypothetical. I see this every week at camps — players say they want to work on skating at home, then describe a routine that's 90% shooting and stickhandling.
- Count weekly ice touches. Players skating 3+ times a week get skating volume already; home surface time is better spent on puck skills. Fewer than 2 skates a week strengthens the synthetic ice case.
- Measure the space. Under ~100 sq. ft., skating on synthetic ice is cramped anyway — a strong sign tiles fit the space better. A 20-pack (45 sq. ft.) already makes a real skills zone.
- Budget the whole zone, not just the floor. Surface + net + targets + pucks. On $800: tiles leave room for all of it; synthetic ice consumes the entire budget on floor alone.
- Start small and test. With tiles you can trial the habit for $139.95 (10-pack) and expand if it sticks. Synthetic ice has no cheap entry point — which is itself useful information.
Common mistakes
- Buying synthetic ice for stickhandling training. You pay a 2–4x premium for skateability, then train in shoes. Fix: match the surface to the actual training plan, not the fantasy one.
- Buying a tiny synthetic ice patch "to start." 40 sq. ft. of skateable surface allows about two strides. Fix: if you can't budget 100+ sq. ft., choose tiles and spend rink time on skating.
- Ignoring maintenance and blade costs. Cleaning, glide treatments, and 2–3x more frequent sharpenings are recurring costs of synthetic ice. Fix: put them in the budget before buying, not after.
- Assuming tiles are "fake synthetic ice." They're a different product with a different job — and at puck skills, they're not the compromise; they're the specialist. Fix: read how tiles work before comparing on price alone.
- Buying either one without a routine. A surface trains nobody by itself. Fix: pair the purchase with the daily plan in hockey training at home.
FAQ
Can you skate on hockey training tiles?
No. Training tiles are a shoes-only surface for stickhandling, shooting, and passing. If you want to skate at home, synthetic ice is the only real option — expect roughly 2–4x the price per square foot plus ongoing maintenance.
Is synthetic ice worth it for home training?
Only if skating itself is what you need to train — edges, stride, goalie movement — or if you have almost no rink access. For puck skills in shoes, training tiles deliver the same glide for about $6 per sq. ft. with zero upkeep, and the savings fund a net, targets, and pucks.
How much cheaper are training tiles than synthetic ice?
Tiles run about $6 per square foot (a 130 sq. ft. 60-pack costs $749.95). Quality synthetic ice typically costs $12–25 per square foot, so the same 130 sq. ft. runs roughly $1,600–3,200 — before maintenance and extra skate sharpening.
Does synthetic ice feel like real ice?
Close, but not identical: expect around 10–15% more glide resistance, which makes skating feel heavier. Many coaches treat that as a training bonus for stride power. Skate blades also dull faster, so plan on sharpening 2–3x more often.
Does a puck slide the same on tiles as on synthetic ice?
For practical training purposes, yes. Both give a real puck near-ice glide, flat passes, and a correct feel off the blade. Tiles stay consistent over time, while synthetic ice can slow slightly as the surface gets shaved by skates between treatments.
Can I put a shooting pad on top instead of buying either?
For pure shooting practice, yes — a shooting pad is the cheapest way to get ice-like glide, from $69.95. You shoot from beside it rather than standing on it. See our shooting pad size guide to choose.
Summary
One question settles this comparison: do you need to skate at home? If yes, buy synthetic ice, budget $1,500+, and accept the maintenance — nothing else does that job. If no — and for most players training shooting, hands, and passing, the honest answer is no — training tiles give you the same puck surface for about a third of the cost, no upkeep, and money left over for the net and targets that make the reps count.
Keep researching: training tiles explained, best shooting pad guide, and how it all fits together in the home hockey training setup. More honest comparisons in the equipment guides hub.