Quick answer
You can improve almost every hockey skill at home with a flat surface of about 4×8 feet, a stick, a few pucks or balls, and 20–30 minutes of focused work per day. Shooting, stickhandling, passing, and conditioning all transfer to the ice when you train them consistently off it. The key is a simple setup, a repeatable routine, and tracking your reps — not fancy equipment or a huge space.
Key takeaways
- 20–30 minutes a day beats one long session a week — consistency drives skill development.
- A garage, basement, driveway, or backyard corner is enough space to start.
- Train four areas at home: shooting, stickhandling, passing, and athletic conditioning.
- A smooth shooting surface protects your stick blade and lets the puck slide like on ice.
- Count your reps. 100 shots and 10 minutes of stickhandling a day add up faster than most players expect.
Why home training works
Ice time is expensive and limited. Most players get a few hours a week on the ice, and almost none of it is dedicated to individual skill repetitions. When I count actual puck touches at a team practice, players are lucky to get 20 shots. At home, you can take 100 shots before dinner.
Skills like shooting mechanics, quick hands, and passing accuracy are built through volume — thousands of correct repetitions. That volume is only realistic at home. This is why NHL players grew up with shooting pads in the garage, and why off-ice training is standard in every serious development program, including those used by the Swedish Ice Hockey Federation.
What do you need to train hockey at home?
Less than most players think. Here is the honest minimum, plus what to add as you get more serious:
| Level | Space | Equipment | What you can train |
|---|---|---|---|
| Starter | 4×8 ft (garage corner) | Stick, stickhandling ball, a few pucks, shooting pad | Stickhandling, wrist shot, snap shot |
| Committed | 8×12 ft | + Passer or rebounder, shooting targets, net | + Passing, one-timers, accuracy |
| Full home rink | 10×15 ft or more | + Training tiles, slide board, backstop net | Everything, including skating-specific conditioning |
The single most useful first purchase is a shooting pad — it gives you an ice-like surface for pucks, protects your stick blade from concrete, and protects the floor from your stick. From there, a passer and a set of training tiles turn a corner of the garage into a real training zone.
How to set up a home training space

- Pick your spot. Garage, basement, driveway, or backyard. You need a flat surface and enough ceiling height to hold your stick normally.
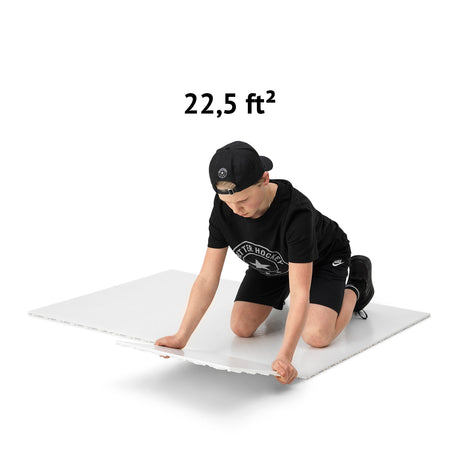
- Lay down a surface. Start with a shooting pad. If you want a bigger permanent area, interlocking hockey flooring tiles let you build a rink-like zone one section at a time.
- Protect what's behind your target. A net with a shooting tarp or a backstop net saves your walls — and your windows.
- Set up targets. Corners win games. Shooting targets in the net make every shot a rep with a purpose.
- Keep gear visible. If the stick and pucks are out and ready, you will train. If they're buried in a bag, you won't.
The four skills to train at home
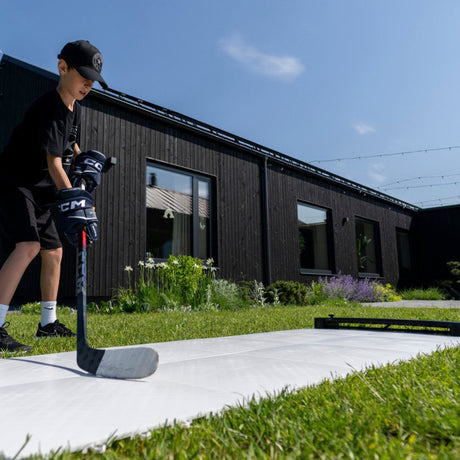
Here's what a complete home training zone looks like in action:
1. Shooting
Volume plus intention. Don't just fire pucks — pick a target, control your mechanics, and track your numbers.
- Wrist shots: 25–50 per session. Focus on weight transfer from back leg to front leg and rolling the puck from heel to toe of the blade. Cue: "push-pull, not sweep" — top hand pulls back as the bottom hand drives through.
- Snap shots: 25 per session. Work on quick release — puck off the blade in under half a second. Watch for: winding up. The power comes from the flex of the stick, not a backswing.
- Accuracy rounds: 20 shots, call your corner before each shot. Count your hits and try to beat yesterday's score.
Coach Erik's tip: The mistake I fix most often in home setups is players shooting flat-footed from a standstill. Stagger your stance and load the back leg before every single rep — a hundred lazy shots just build a lazy shot.
2. Stickhandling
The highest-value skill per square foot — you can train hands in a space the size of a doormat.
- Basic dribble: 2 minutes narrow, 2 minutes wide. Head up, eyes off the ball — have a parent or teammate flash fingers and call out the number while you dribble.
- Around obstacles: set up pucks or cones and work figure-eights, 3 minutes.
- Toe drags and fakes: 3 minutes. Slow and correct beats fast and sloppy.
Use a stickhandling ball on bare floor, or a real puck if you're on a pad or tiles. A stickhandling trainer adds obstacles that force you to extend your reach like a defender's stick would.
Coach Erik's tip: Every couple of weeks, move your obstacles closer together. Shrinking the space forces quicker hands — most players I train plateau simply because their setup never gets harder, not because they stopped practicing.
3. Passing
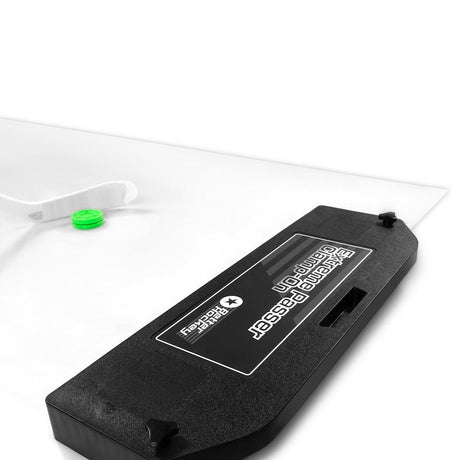
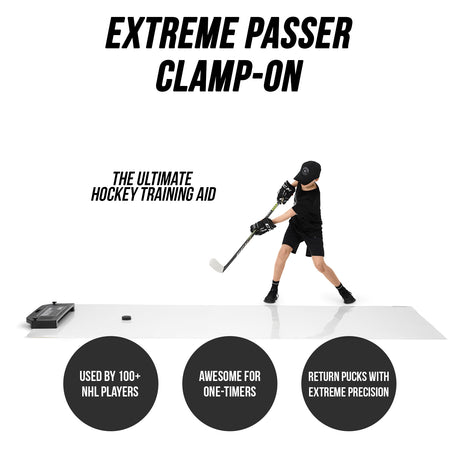
Passing is the most neglected home skill I see, because everyone assumes you need a partner — except you don't. A rebounder returns the puck to your blade, so you can train give-and-gos alone.
- Stationary passes: 50 per session against a rebounder or passer.
- One-touch passes: 25 per side. Receive and release in one motion. Cue: cushion the pass — soft top hand, don't stab at the puck.
- Saucer passes: 20 attempts over an obstacle (a glove works fine) onto a target.
4. Conditioning
Hockey-specific athleticism you can build without any ice: leg power, core strength, and the lateral movement pattern of a skating stride. A slide board replicates the stride better than any gym exercise — 3 sets of 30–45 seconds is a leg workout that transfers directly to skating speed. Add squats, lunges, and planks on days between skill sessions.
A simple weekly routine
This plan takes 25–30 minutes a day, six days a week. Adjust the volume down for younger players — see the age note in the FAQ.
| Day | Focus | Session |
|---|---|---|
| Monday | Shooting | 100 shots: 50 wrist, 25 snap, 25 accuracy round |
| Tuesday | Hands | 10 min stickhandling + 50 passes |
| Wednesday | Conditioning | Slide board or legs/core workout, 20 min |
| Thursday | Shooting | 100 shots, call every target |
| Friday | Hands | 10 min stickhandling + 25 one-touch, 20 saucer passes |
| Saturday | Game day mix | 15 min: your weakest skill of the week |
| Sunday | Rest | Recovery — or just play for fun |
Common mistakes to avoid
- Shooting off concrete or asphalt. It ruins blades and teaches a false feel. Always use a pad or tiles.
- Training only your favorite skill. Almost every player I coach over-trains shooting and never touches passing. Follow a plan, not a mood.
- Watching the ball or puck while stickhandling. Heads-up from day one — it's the whole point.
- Marathon sessions. Two hours on Sunday does less than 25 minutes a day. Skill is built by frequency.
- No way to measure progress. Count shots on target, time your drills, write it down. What gets measured improves.
FAQ
How much space do I need to train hockey at home?
About 4×8 feet is enough for shooting and stickhandling — the size of one shooting pad. A full home setup with passing and a net fits comfortably in a single garage bay or a 10×15 ft patch of backyard.
How long should a home hockey training session be?
20–30 minutes of focused work is the sweet spot for most players. Short daily sessions build skill faster than long occasional ones, and they're easier to stick with year-round.
Can I use a regular puck on my driveway?
You can, but it slides poorly and chews up your stick blade. A shooting pad or training tiles give a puck near-ice glide. On bare floors indoors, a stickhandling ball is the better tool.
What equipment should I buy first?
A shooting pad, a stickhandling ball, and a handful of pucks — that covers shooting and hands for under the cost of one hour of private ice. Add a passer or rebounder next, then targets and a net.
Is home training enough without ice time?
It won't replace skating, but it multiplies what ice time you have. Players who train hands and shot at home spend their ice time using skills instead of learning them. In the off-season, home training is how you show up in September ahead of everyone else.
What age can kids start training at home?
From about age 5–6, as games: knock-down targets, obstacle dribbles, mini competitions. Keep it under 15 minutes and fun-first. Structured routines like the weekly plan above make sense from roughly age 10 and up.
Summary
Home training is the highest-leverage thing a hockey player can do between practices: a small flat space, a shooting surface, a ball and some pucks, and a 25-minute daily routine covering shooting, hands, passing, and conditioning. Start with the starter setup, follow the weekly plan for one month, count your reps — and you'll feel the difference on the ice before the month is over.
Ready to go deeper on each skill? Continue with our shooting guides, stickhandling drills, and the full off-ice training library.