Quick answer
Puck control is two distinct skills — protecting the puck while stationary or under pressure, and moving the puck efficiently in open ice — and most players practice only the second one. Body position is the foundation: low stance, bent knees, puck in front of your lead foot, stick at an angle so you can shield with your body. From there, 10 progressive drills, from single-cone circles to under-pressure tight-space work, build both skills in 20 minutes a day.
Key takeaways
- Protecting the puck and moving the puck are different skills. Train both, not just one.
- Body position comes before hand position. If your stance is wrong, no amount of hand drills fixes your puck control under pressure.
- Low equals controlled. Every player who loses pucks under pressure is standing too tall. Drop your hips.
- Tight-space control — less than 1 m of working area — is where most goals and turnovers are decided. Train it specifically.
- A heavier training ball or puck builds hand strength faster than standard equipment — but use it for no more than 30% of your reps.
- 4–6 cones and a stickhandling trainer are all you need for a complete 20-minute puck control session.
Body position: the foundation of puck control
The first thing I check when a player is losing pucks in practice is their stance, not their hands. A proper puck-control stance has five elements:
- Feet shoulder-width apart. Narrower and you have no base to pivot from; wider and you lose lateral movement speed.
- Knees bent to at least 90 degrees. Not slightly bent — genuinely low. Your thighs should be close to parallel with the ground in the maximum protect position. Cue: "sit in the chair."
- Chest over the puck. Your upper body naturally creates a shield when you lean forward. Standing upright exposes the puck on both sides.
- Puck in front of your lead foot. Not at your side, not behind you — out front, where you can see it with peripheral vision and still look up.
- Stick angle at roughly 45 degrees. A flat stick has no reach on the backhand; a steep stick limits forehand extension. The 45-degree hold gives you both.
Coach Erik's tip: Most young players learn to stickhandle standing nearly upright because that's comfortable. Then the first body check at Peewee level knocks the puck right off their stick. Drill the low stance from day one — put a cone in front of you at hip height and practice keeping your chest lower than the cone through every rep.
Protecting vs. moving the puck: what each demands
| Skill | Body position | Stick position | Key habit | When you use it |
|---|---|---|---|---|
| Protecting the puck | Very low, wide stance | Pulled close, shield with body | Back to pressure, puck on far side | Board battles, corners, under forechecking pressure |
| Moving the puck | Athletic, mobile, ready to push off | Extended for reach, soft hands | Eyes up, puck in peripheral vision | Open ice, transitioning, setting up plays |
| Receiving a pass under pressure | Low, weight back slightly | Soft cushion on reception | Absorb the pass, don't let it bounce | Receiving in the slot, under forecheck |
| Battling for a loose puck | Lowest possible, sideways to defender | One hand if needed for reach | Pin the puck to boards first, then find space | Corners, behind the net, loose puck races |
10 puck control drills with progression

All 10 drills work on a stickhandling trainer or a hard floor with a stickhandling ball. Drills 1–5 are open-space control; drills 6–10 are tight-space and pressure work.
| # | Drill | Equipment | Duration/Reps | Progression |
|---|---|---|---|---|
| 1 | Side-to-side forehand-backhand | Stickhandling trainer + ball | 3×60 sec | Eyes up after 1 week; add heel-toe shifts |
| 2 | Figure-8 around 2 cones | 2 cones, ball or puck | 3×45 sec | Reduce cone spacing by 15 cm each week |
| 3 | Wide-to-narrow pulls | Stickhandling trainer | 3×30 reps | Increase range of motion, not just speed |
| 4 | One-hand control (top hand only) | Ball | 2×30 sec per hand | Switch between hands on call |
| 5 | Toe drag + pull back | Stickhandling trainer + ball | 3×15 reps each side | Add forward step during the drag at Week 3 |
| 6 | Tight cone circle (60 cm diameter) | 4–6 cones, ball | 3×45 sec | Decrease circle diameter; add body contact from partner |
| 7 | Wall protect drill | Wall, puck | 3×30 sec | Partner tries to poke from behind |
| 8 | Stickhandling trainer reaction pulls | Trainer + ball + partner | 4×45 sec | Partner calls direction; player must switch within 1 sec |
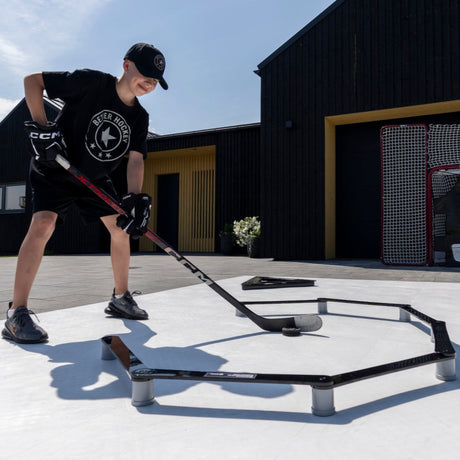
| 9 | Under-pressure deke box | Pro Defender + cones | 5 reps × 10 passes through | Defender moves laterally; player must read and beat it |
| 10 | Heavy ball/puck sets | Heavy puck or weighted ball | 3×30 sec, then back to regular ball | Max 30% of total session reps; technique must stay clean |
Tight-space puck control: the most undertraineed skill
Recreational players practice in open space. Games happen in traffic. The slot, behind the net, and the corners are all tight spaces where you have less than 1 m to operate — sometimes half that. Drill 6 (tight cone circle) is the entry point, but the real test is keeping control while someone applies physical pressure.
Set up 4 cones in a 1 m x 1 m square. The puck-carrier must keep the puck inside the square while a partner stands at the edge and tries to poke it out. No body contact needed — the poke check alone forces the puck-carrier to use proper low stance, keep the puck shielded, and make quick direction changes. Time in the square: 30 seconds on, 30 seconds off, 5 rounds. Track the number of successful poke checks per round — aim to reduce that number week over week.
For solo tight-space work, the Game Changer naturally constrains your working area and forces rapid, precise puck movement within a small surface. 5 minutes of Game Changer at the end of a puck control session adds meaningful tight-space stimulus without needing a partner.
The heavier ball and puck progression
A heavy training puck (roughly twice the weight of a standard puck) builds wrist and forearm strength that translates directly to faster, more controlled hands at game speed. The rule is 30/70: 30% of your reps with the heavy puck, 70% with a standard puck or ball. Doing more than 30% causes fatigue to distort your technique — you start compensating with shoulder movement instead of true wrist control.
The progression: Week 1 — 10 heavy puck reps per drill. Week 3 — 15 reps. Week 5 — 20 reps. Never increase the heavy percentage past 30% of total session reps. After each heavy set, go straight back to the regular ball and notice how much easier the control feels. That contrast is the training effect you're after.
Coach Erik's tip: If you only have time for one puck control habit, make it this: end every stickhandling session with 60 seconds of eyes-up free movement. No drills, no pattern — just move the puck at game speed while actively looking up and around. Most players I train have excellent puck feel looking down and poor puck feel looking up. That's exactly backwards from what the game requires.
Common mistakes
- Standing too tall. The puck is completely exposed. Fix: drill in front of a mirror or film yourself — your hips should visibly drop when you move into the control position.
- Puck too far out front. More than one stick-length away means a defender can reach it without committing to a poke. Fix: keep the puck within 30–40 cm of your front foot when protecting.
- Stiff top hand. A tight grip kills the soft touch needed for puck feel. Fix: 1-minute top-hand-only stickhandling — you cannot control the puck well with a stiff top hand when the bottom hand is removed.
- Only practicing in open space. The drill table exists for a reason — deliberately practice drills 6–10 where space is restricted. Open-space skill does not automatically transfer to tight spaces.
- Always looking at the puck. Game-speed puck control requires eyes up. Fix: partner raises 1, 2, or 3 fingers periodically during stickhandling — player must call the number without looking down.
FAQ
What is the difference between stickhandling and puck control?
Stickhandling is the hand movement skill — moving the puck side to side, toe drags, dekes. Puck control is broader: it includes body position, shielding, protecting in tight spaces, and the decision-making around when to hold and when to move. Good stickhandling contributes to puck control, but body position and awareness matter just as much.
How do I get better at puck control in tight spaces?
Drill deliberately in tight spaces — specifically drill 6 (cone circle) and drill 7 (wall protect) from the table above. The key is combining a low, wide stance with active shielding: turning your body between the defender and the puck. Practicing in open space doesn't transfer automatically. You have to train tight spaces specifically.
How many puck control reps should I do per day?
20 minutes of focused drilling, 5–6 days a week, is enough to see clear improvement in 4–6 weeks. That's roughly 500–800 total reps depending on drill speed. Raw volume matters less than attention — 200 fully focused reps with correct body position beat 800 careless ones.
Does a heavier puck actually improve puck control?
Yes — specifically for wrist strength and blade feel. The heavier resistance forces your wrists to work harder to control the puck, and returning to a regular puck after heavy sets trains a noticeably faster, lighter response. Keep heavy reps under 30% of total session volume to avoid technique breakdown from fatigue.
How do I stop losing pucks in board battles?
Board battles are won with body position before hand skill. Get your back to the pressure, drop your hips as low as possible, and place the puck on the far side of your body from the defender. The "wall protect drill" (drill 7) trains this specifically. Once the body position is automatic, you can start thinking about the escape move — spinning, reversing, or passing out.
At what age should kids start specific puck control training?
Basic body position and open-space stickhandling from age 7–8. Tight-space and pressure work from about age 10, when players start encountering real defensive pressure on ice. Heavy pucks should wait until 12–13 when wrist development is robust enough to handle resistance without technique distortion.
Summary
Puck control starts with body position — low stance, bent knees, chest over the puck — and then adds hand skill through the 10-drill progression. Train protecting the puck and moving the puck as separate skills, because they demand different body mechanics. Add tight-space work in drills 6–10, use a heavy puck for 30% of your reps to build strength, and end every session with 60 seconds of eyes-up free movement.
Related reading: how to improve your stickhandling, best hockey stickhandling drills, and hockey dekes every player should know.