Quick answer
Skating speed in hockey is almost entirely lateral — the power you generate sideways into each stride, not forward like a sprinter. To build a faster hockey stride, you need to train lateral force production specifically: slide board training is the most direct tool, lateral bounds and skater jumps build explosive power, and a strength base of lateral lunges and Copenhagen planks protects the hip and groin while making each push-off more powerful. Follow a 4-week progressive plan that alternates slide board volume with plyometric intensity, and most players add noticeable stride power within 6 weeks.
Key takeaways
- Skating stride power = lateral force, not forward running speed. Forward sprinting ability has low correlation with skating velocity.
- The slide board is the highest-specificity off-ice tool for skating stride training — the mechanics of the push-off and recovery are near-identical to skating.
- Full extension on every push-off is the most important technique point. Short-cutting it is the most common reason players stall on the slide board.
- Lateral plyometrics (bounds, skater jumps) build the explosive power that makes each push-off maximally effective.
- Lateral strength (lateral lunges, Copenhagen planks) is the injury prevention and power foundation that makes everything else sustainable.
- Four weeks of structured progression is enough to see real change — consistency over those weeks matters more than intensity on any single day.
Why lateral power drives skating speed
When a skater pushes off, the force goes out to the side — not backward like a runner. The blade is angled outward, and the entire propulsive force vector is lateral. This means a player with a strong forward sprint but weak lateral hip extensors will always underperform their apparent athletic ability on the ice.
Studies comparing forward sprint speed with skating speed in trained hockey players regularly show weak to moderate correlations. Lateral power measurements — like the lateral bound distance or the lateral force plate peak — correlate much more strongly. The practical implication: if you want to skate faster, your off-ice training must prioritise lateral strength and power, not treadmill sprint work.
The slide board is the most direct translation. It replicates the lateral push-off, the glide phase, and the edge-loading of the recovery — in shoes, off ice. No other off-ice tool comes close to this specificity.
Slide board technique: the four cues that determine your results
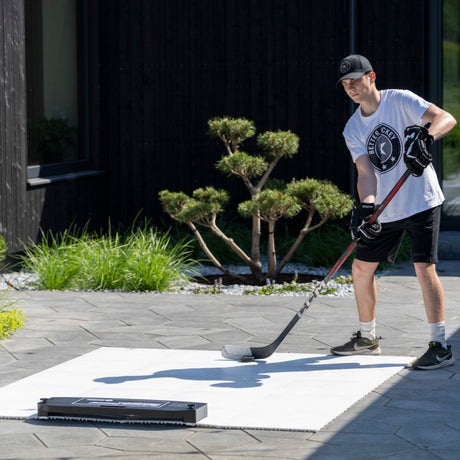
The Extreme Hockey Slide Board Pro is designed for full-extension skating mechanics. Get the following four technique points right before adding volume or speed.

- Full extension on every push. Your pushing leg must reach full extension — nearly straight — before you transfer weight to the glide leg. This is the skating stride. Cutting the push short produces shorter, weaker strides on ice. Cue: "Straighten the leg completely before you glide."
- Stay low throughout. Hip height should stay roughly constant — not bobbing up on each push and sinking on each glide. Low hip position is what transfers to a skating crouch. Watch for: hips rising sharply on the push. Fix: consciously hold the same knee bend through the entire stroke cycle.
- Drive the arm opposite to the push leg. The arm swing is not decorative. Counter-rotating the arms provides balance and adds roughly 10–15% more lateral force through the core. Cue: "Left arm forward when right leg pushes."
- Soft landing on the bumper. You shouldn't crash into the end bumper — arrive with control and immediately redirect the push. Crashing into the bumper means you're coasting. Fix: think of the bumper as a reminder to push, not a stop point.
Coach Erik's tip: Film yourself from the side on your first few sessions. The error I see in about 80% of new slide board users is never reaching full extension — the back leg bends again before it's fully straight. It's an unconscious energy-saving habit. Once you see it on video, it corrects quickly. Two sessions later, the extension is automatic.
Lateral bounds and skater jumps: the power layer
The slide board trains the pattern. Lateral plyometrics train the rate of force development — how fast and how hard you can produce that lateral push. Both are needed. Use this progression:
| Exercise | Sets × Reps | Cue | When to progress |
|---|---|---|---|
| Lateral step-out | 3 × 10/side | Control the landing, no knee cave | Clean landing every rep, 3 sessions |
| Skater jump (small) | 3 × 8/side | Land on one leg, hold 2 sec | No wobble on landing, 3 sessions |
| Lateral bound (full) | 4 × 6/side | Maximize distance, soft landing | Distance improving session to session |
| Continuous skater jump | 4 × 10 | Minimal ground contact time | Rhythm is fluid, no stutter |
| Band-resisted skater jump | 3 × 8/side | Drive hard against the band | Same as continuous without band |
Rest 60–90 seconds between sets of lateral bounds — these are power exercises, not conditioning. Too little rest produces slower, weaker reps that train endurance patterns instead of power.
Strength base: lateral lunges and Copenhagen planks
The explosive layer only holds if the underlying strength is there. Two exercises cover most of the lateral strength demand for skating:
- Lateral lunge. Step out wide to the side, push the knee over the foot, lower the hip until the thigh is parallel to the floor, drive back to standing. Builds hip abductor and adductor strength through the full range the skating stride uses. 3 × 10 per side. Progress to a loaded version (dumbbell at chest) when bodyweight feels controlled.
- Copenhagen plank. Side plank position, top foot on a bench or box, bottom leg hanging. Hold position — the inside thigh of the bottom leg must work hard to stay in line. This is the most specific groin and adductor strength exercise for skating. Weak adductors are the leading cause of groin injuries in hockey players. Start with 3 × 15-second holds, build to 3 × 30 seconds before adding a dynamic version.
Coach Erik's tip: Most players skip Copenhagen planks because they're not glamorous. The players who do them consistently are also the ones who avoid groin strains through long seasons. I make them non-negotiable in any skating strength program. If they feel easy, you haven't found the correct position — move the foot further out on the bench until the inner thigh is working hard.
4-week progression plan
| Week | Slide board | Plyometrics | Strength |
|---|---|---|---|
| 1 — Technique | 3 × 3 min, easy pace, full focus on extension cues | Lateral step-out + small skater jump, 3 sets | Lateral lunge 3×10, Copenhagen 3×15 sec |
| 2 — Volume | 4 × 3 min, adding speed in the middle minute of each set | Lateral bound (small) + continuous skater jump, 3–4 sets | Lateral lunge 3×12, Copenhagen 3×20 sec |
| 3 — Intensity | 4 × 2 min at near-maximum speed + 1 min rest between | Full lateral bound for max distance + band-resisted skater jump | Loaded lateral lunge 3×10, Copenhagen 3×30 sec |
| 4 — Integration | 3 × 4 min with 30-sec sprint finish each set | Combine: bound → skater jump → bound (circuit), 4 rounds | Reduce to 2 sets, focus on quality and freshness before ice |
Run this block 3 days per week (e.g., Monday/Wednesday/Friday), leaving rest days between sessions. Week 5 onwards, either repeat Week 3 with heavier loads or move to a more advanced block from the weekly off-ice program.
Common technique faults
- Short-stroking on the slide board. Never reaching full extension. Fix: place a small cone or target near the bumper and touch it with your pushing foot before transferring weight. Forces the leg to travel the full range.
- Hip bobbing up on every push. Shows a strength deficit, not a technique issue. Fix: add more lateral lunge volume before slide board sessions.
- Landing with the knee collapsing inward on bounds. Weak hip abductors. Fix: loop a light resistance band around the knees during lateral step-outs to train the external rotators to hold position.
- Skipping the full extension on skater jumps. Players rush to the next rep. Fix: hold the single-leg landing for 2 full seconds before the next jump. This is non-negotiable until the landing is stable.
- Training laterally but ignoring forward skating strength. A common overcorrection after learning lateral power is important. Both matter — pair this block with general lower-body strength (squats, hip hinges) from the ultimate off-ice guide.
FAQ
Does running make you a faster skater?
Forward running builds cardiovascular base and some general leg strength, but it does not transfer well to skating speed because the force direction is opposite — forward in running, lateral in skating. Lateral-specific training (slide board, lateral bounds, lateral lunges) produces far more direct improvement in stride power than forward sprint work.
How long should I train on the slide board per session?
In Week 1, 3 sets of 3 minutes at a controlled pace is appropriate to learn the technique without fatigue-driven errors. By Week 3, 4 sets of 2 minutes at near-maximum speed is a good intensity target. Total slide board time per session: 10–15 minutes of actual work, not counting rest.
What is the difference between a lateral bound and a skater jump?
A lateral bound is a maximum-distance single jump to the side, landing on the opposite leg and absorbing the landing with a full knee and hip bend. A skater jump (also called a skater hop) is a faster, lower-amplitude version — less distance, faster rhythm, emphasising quick ground contact. Both are useful: bounds train peak power, skater jumps train the rate of force development that mimics stride rhythm.
How often should I do the Copenhagen plank?
3 times per week is ideal, always as part of a strength or warm-up session rather than after heavy lower-body work. Progress from 15-second holds to 30-second holds over 3–4 weeks, then add a dynamic version (lowering and raising the hips) to continue challenging the adductors.
Can youth players do lateral power training?
Yes, with age-appropriate loads. Players aged 12 and up can do all of the plyometric progressions with bodyweight, and the Copenhagen plank at shorter holds (10–15 sec). Slide board training is appropriate from about age 10 if supervised. Avoid loaded lateral lunges until a player is comfortable with bodyweight versions — usually age 13–14.
How quickly will I see skating improvement from this training?
Technique changes on the slide board are usually visible within 2–3 sessions. On-ice stride power typically improves noticeably after 4–6 weeks of consistent off-ice lateral training — sooner for younger players, who adapt quickly. The clearest sign of progress is a longer, more efficient stride with less visible effort.
Summary
Building a faster hockey stride means building lateral power specifically — not just being more athletic in general. The Extreme Hockey Slide Board Pro is the foundation: train full extension, low hip position, and matched arm swing on every rep. Layer lateral bounds and skater jumps to build explosive force production, and Copenhagen planks plus lateral lunges to build the strength that sustains it. Follow the 4-week plan, 3 sessions per week, and track extension quality and bound distance session to session.
For a complete off-ice training programme that combines this lateral work with upper body, conditioning, and recovery, see the weekly off-ice hockey programme and the full ultimate off-ice guide.