Quick answer
An off-ice hockey training schedule that actually works runs 5 days a week, 25 minutes a session, with progressive overload built in across 4 weeks. Week 1 builds the movement pattern. Week 2 adds reps. Week 3 adds speed and constraint. Week 4 is a test week — you measure what improved. Print the 4-week table below, tape it to your garage wall, and check off each session. That is the whole system.
Key takeaways
- 25 minutes a day, 5 days a week is enough to see real improvement in 4 weeks — if the sessions are structured.
- Progressive overload is what separates a training plan from random practice. Each week is slightly harder than the last.
- Print this schedule and physically check boxes. The act of marking a session done is a better motivator than any app.
- Week 4 is a test week — same drills as Week 1, timed. This is how you measure improvement objectively.
- Scale by age: under 12, cut reps by 30%. Over 16, add the optional power block.
- The Game Changer stickhandling board and a shooting pad are the two pieces of gear that make the most drills possible in a small space.
Why most off-ice schedules fail
Most players don’t fail because of lack of effort. They fail because the schedule has no structure. They do the same 50 shots on Tuesday that they did three weeks ago, and the body stops adapting. The first thing I look at when a player tells me their off-ice work “isn’t working” is whether there’s any overload built in. If every session looks the same, nothing changes.
The plan below solves this with three variables that increase each week: volume (reps), intensity (speed or constraint), and specificity (closer to game conditions). Week 1 is deliberately easy — enough to build the habit, not so hard you dread it on day two.
The 4-week printable schedule
Print this page and tape it to your garage wall or training space. Check each cell when done. The session key is below the table.
| Week | Monday | Tuesday | Wednesday | Thursday | Friday | Sat/Sun |
|---|---|---|---|---|---|---|
|
Week 1 Build the pattern |
SH-A 2×10 each hand + 20 wrist shots |
PASS-A 3×10 reps each side |
SH-A 2×15 each hand + 20 wrist shots |
COND-A 3×30 sec lateral shuffle |
COMBO-A SH + PASS 15 min each |
Rest / skate |
|
Week 2 Add volume |
SH-B 3×15 each hand + 30 wrist shots |
PASS-B 4×10 reps each side |
SH-B 3×15 each hand + 30 wrist shots |
COND-B 4×30 sec shuffle + 2×20 squat |
COMBO-B SH + PASS full 25 min |
Rest / skate |
|
Week 3 Add speed + constraint |
SH-C 3×15 each hand timed 60 sec + 30 shots |
PASS-C 4×12 reps 1-touch only |
SH-C 3×20 each hand timed 60 sec + 30 shots |
COND-C 4×40 sec shuffle + 3×20 squat + 10 jump squat |
COMBO-C Full 25 min all timed |
Rest / skate |
|
Week 4 Test + peak |
TEST Same as W1 Mon Count reps in 60 sec |
TEST Same as W1 Tue Count successful passes |
SH-C Max reps in 90 sec + 40 shots |
COND-C Same as W3 Thu Record times |
FULL TEST All drills record everything |
Rest / full ice |
Session key:
- SH-A/B/C — Stickhandling. On a Game Changer LITE or shooting pad. A = slow controlled; B = full speed; C = timed/constrained.
- PASS-A/B/C — Passing against wall or rebounder. A = focus form; B = add volume; C = 1-touch only, no re-positioning.
- COND-A/B/C — Conditioning: lateral shuffle and squat progression (no equipment needed).
- COMBO — Combined session: split 25 minutes between stickhandling and shooting equally.
- TEST — Week 4 test days: run Week 1 drill, count reps or accuracy, compare.

Daily 25-minute session template
Every session follows this structure, regardless of which day or week. Adjust the drills per the weekly plan above.
| Block | Time | What you do | Cue / focus |
|---|---|---|---|
| Warm-up | 3 min | Slow forehand–backhand stickhandling, no speed | Feel the ball, not the clock |
| Stickhandling block | 8 min | Per the weekly plan (SH-A/B/C) | Head up every 3rd rep |
| Shooting block | 8 min | Per the weekly plan (20–40 wrist shots) | Hold follow-through every rep |
| Passing / skill block | 4 min | Per the weekly plan (PASS-A/B/C) | Soft hands on receive |
| Cool-down / review | 2 min | Write reps/accuracy on the schedule. Check the box. | Two numbers: reps + accuracy |
Coach Erik’s tip: Two minutes of review at the end of each session is worth more than five extra minutes of drill time. Write your stickhandling reps and your shooting accuracy on the printed schedule. When Week 4 arrives, you have real data. Most players I work with are shocked by how much they improved when they actually track it.
Drill details: what each session actually looks like
Stickhandling drills
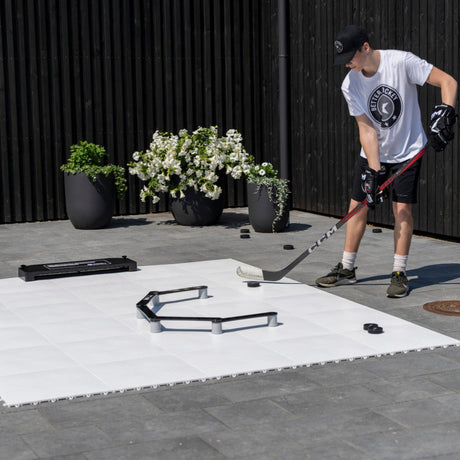
All stickhandling drills work on a Game Changer LITE, a stickhandling trainer board, or on a shooting pad. Use a stickhandling ball — balls are better than pucks for off-ice hand-speed work because they require more blade control.
- Basic forehand–backhand sweep: Ball crosses the centerline of your body on every touch. 10 reps = 10 crossings each side. Cue: “quiet hands, moving ball.”
- One-hand tight circles: Top hand only, 10 small circles each direction. Forearm burn is normal. This is exactly what top-hand control feels like.
- Figure-8 around cones: 2 cones 40 cm apart, figure-8 pattern. Count full loops, not touches.
- Backhand only: 15 touches backhand side, slow, then 15 fast. Most players are 30–40% weaker on the backhand. This closes the gap.
Shooting drills
Use a shooting pad or the flooring tiles shooting kit. Hang shooting targets if you have a net — they convert random shots into accuracy data.
- Wrist shot mechanics: 20 reps at 70% power, hold follow-through. Puck starts behind back foot every rep.
- Corner call shots: Name the corner before you shoot. Track hits. Honest. Watch for: stopping the follow-through early.
- Quick release: Puck already in position, shoot within 1 second of touching it. Week 3 and 4 only.
Coach Erik’s tip: Shooting is the one area where random reps actually do some damage — players ingrain bad habits at full speed. In Weeks 1 and 2, cap your shooting power at 70%. Get the mechanics right first. Week 3 is when you open it up, because by then the pattern is there. The players who try to shoot hard from Day 1 plateau by Week 3.
How to track progress and check boxes
The printed schedule has one job: keep you honest. After each session, do two things:
- Check the box. A physical tick in a printed grid works better than a phone app for this. The visual of a completed row is a stronger motivator than any notification.
- Write two numbers. Stickhandling reps in your timed block and shooting accuracy (hits out of the last 10 aimed shots). Write them small in the cell.
By Friday of Week 4, you have 20 sessions of data. Run the Day 1 drills again. The numbers tell you exactly what improved. Most players see 20–40% more stickhandling reps and 3–5 more accuracy hits out of 10.
Scaling by age
| Age group | Adjustment | Focus |
|---|---|---|
| Under 10 | Cut all reps by 40%. Sessions 15–18 min max. | Pattern and fun. No timed blocks in Weeks 1–2. |
| 10–13 | Cut reps by 20%. Skip jump squats in COND block. | Technique first, speed second. |
| 14–16 | Follow plan as written. | Full progressive overload, measure everything. |
| 16+ | Add 10 reps to each block. Add jump squats Week 2. | Power and speed emphasis in Weeks 3–4. |
Common mistakes
- Skipping the warm-up. Three minutes of slow stickhandling isn’t optional — it sets the feel for the whole session. Skip it and your first 5 minutes of real drilling are warm-up anyway, just uncounted.
- Doing Week 3 intensity in Week 1. The overload schedule exists for a reason. Starting too hard means you hit a wall in Week 2 and quit. Trust the ramp.
- No goal net or target for shooting. Shooting at a wall with no target trains nothing. Put tape marks, use shooting targets, or aim at a specific spot on the wall. Vague shooting builds vague aim.
- Missing more than 2 sessions per week. The progressive overload only works if you actually complete each week before advancing. Miss 3 sessions in Week 2, repeat Week 2 — don’t advance to Week 3.
- Not printing the schedule. If it’s only on your phone, you will not track it. Print it. Tape it up. Paper beats app for habit formation in training.
FAQ
How many days per week should I do off-ice hockey training?
Five days a week, 25 minutes a session, is the practical standard for players 10 and up during off-season. That’s 125 minutes of weekly training — enough for real skill development without overloading the body. Beginners can start with 3 days a week and add a fourth in Week 2.
What equipment do I need to follow this off-ice training schedule?
At minimum: a shooting pad or smooth surface, a stickhandling ball, and a hockey stick. The plan works better with a stickhandling board (Game Changer LITE or trainer board), shooting targets, and 6 cones — but none of these are required for Week 1.
Can I do this training schedule in a small space?
Yes. A 2 m x 3 m clear area covers all stickhandling drills. The shooting block needs about 4 m of runway — a driveway, garage, or hallway works. The conditioning block (shuffles and squats) needs no equipment at all.
How quickly will I see results from off-ice training?
Most players notice cleaner stickhandling feel within 10–14 days. Shooting accuracy improvements typically show up in Week 3 data. Week 4 test data against Week 1 baseline usually shows 20–40% more reps in timed stickhandling blocks.
Should I follow this schedule during the hockey season?
Reduce to 3 days a week during the season and cut reps by 25–30% to avoid fatigue. The stickhandling and shooting blocks are the most valuable to keep during season — drop the conditioning block if time is short, since practice and games cover conditioning.
How do I scale this schedule for a 9-year-old?
Cut all reps by 40%, shorten sessions to 15 minutes, and skip the timed blocks for the first two weeks. Focus on pattern (does the ball move smoothly?) rather than volume. At that age, 15 minutes of quality stickhandling beats 25 minutes of frustrated swinging.
Summary
A printable off-ice hockey training schedule works because it makes the progression visible, the tracking unavoidable, and the habit automatic. Print the 4-week table, check boxes daily, write two numbers per session, and run the Week 1 drills again at the end of Week 4. That data gap is your off-season improvement in hard numbers.
This schedule pairs directly with the weekly off-ice hockey program — that article covers the philosophy; this one gives you the exact daily grid to execute it. For a broader overview of all off-ice training methods, see the Ultimate Off-Ice Hockey Training Guide.